DNS is a complex system. What you have read so far is just the tip of… the tip of the iceberg. I hope it is enough, however, to help you decide if any of these “DNS hacks” could be useful for you, and show you the road to implement them:
- always use your preferred resolver, wherever you are
- cache dns records on your own computer
- give permanent names to any device in your home or office, for LOCAL use
- give your home or office computers permanent names… to access them FROM THE INTERNET
There are several valid reasons why you may want to use any combinations of the first two hacks. In most cases they may NOT give you significantly faster Web browsing. Not if you already have a professional ISP and a fast connection, that is. Hacks 1 and 2 can instead help you, especially when traveling with a laptop, to surf faster and avoid annoyances.
Some ISPs, in fact, have underpowered DNS resolvers. Others (for example the ones behind certain restaurants or hotels) may exploit your DNS queries to wrap any error page you get in advertising, or, in extreme cases, simply censor some websites. Using your own resolver or DNS cache may often be all you need to avoid these problems.
The reasons for trying hacks 3 and 4 are of the kind that is irrelevant for many users, but life-savers for many others.
Giving permanent names to any “smart” device in your home or office from network drives to Tvs and printers, lets every resident or visitor use them in an easy, consistant way. One way to do this, and get reusable DNS skills along the way, is to install a local primary name server, for a local DNS zone.
Hack 4 makes much easier, when it is not THE only solution, things like: automatic backups or folder synchronization among distant computers; remote control of webcams and other home devices; transparent access to any application,movie, photo or other document you keep at home, no matter where you are. By default, this is not possible with home or small office network whose Internet connections do not offer PERMANENT IP addresses and host name for your computer(s).
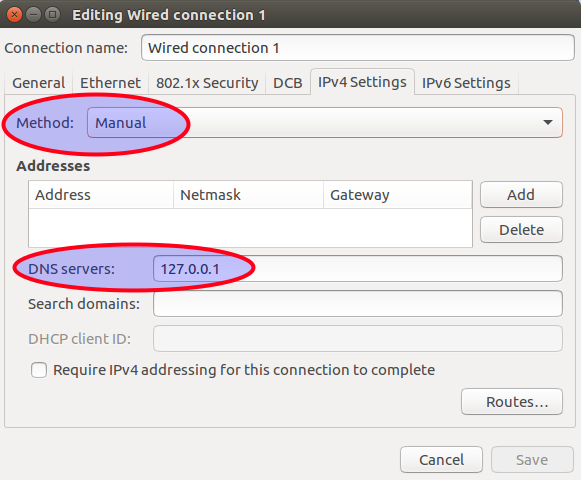
How do you implement the four hacks above? Easy. For the first one, look no further than Figure 3: find out where your distribution wants you to write the IP address of your resolver, and write it there. For the second hack, go to the “Configure a CACHING-only server” section below.
The third hack requires adding to the caching-only name server the options and zone files that let it associate LOCAL IP addresses with LOCAL names valid only on the local network. The last hack consists of doing the same thing in some data center, with different configuration options.
Mandatory warning before continuing to read: the actual configuration of a name server depends of many factors, from which version of which Linux distribution you use to its surrounding environment (LAN or single computer, firewalls, boot procedures etc..). Due to space constraints, it is simply not possible to explore all the possible variants: you need to integrate the explanations below with the DNS documentation of YOUR Linux distribution!
Configure a CACHING-only name server
The most common DNS server for Linux is called BIND (Berkeley Internet Name Domain): you can easily install it and all its dependencies from the standard repositories of most distributions.
After installation, the main steps to take to configure BIND for the use cases presented above are:
- customize its configuration file (/etc/named.conf by default)
- create zone files, if needed
- tell your computer(s), via resolv.conf or equivalent systems, to use the LOCAL IP address of the computer running BIND as DNS resolver.
If the ONLY thing that your BIND must do is caching requests for the computer it runs on, then these options in named.conf should be enough:
listen-on port 53 { 127.0.0.1; };
allow-query        { localhost; };
allow-query-cache  { localhost; };
recursion yes;
taken together, the first three settings above make BIND listen for queries on TCP port 53, accept them only from the same computer (localhost) and cache their results. You can add other hosts or networks in the allow-query settings, if the server must also work for them. The fourth line means that BIND must not stop querying high-level DNS servers until it finds an answer. You could also add “forwarders” settings, to specify the IP address of the EXTERNAL resolver to use for queries that are not already cached. Without forwarders, BIND would pass uncached queries directly to the root servers listed in the file /var/named/named.ca.
Configure BIND as complete primary DNS server
To transform the cache-only server of the previous paragraph in the primary one for a given domain you must do two things: create zone files for that domain and its hosts, and load them in the named.conf file.
For LOCAL host names, only valid inside a LAN, you may create a mydomain.local domain name, and define its hosts in a forward zone file called /var/named/mydomain.local.db. This file would have the syntax described above, and contain records of type A, and possibly CNAME and MX. Were PTR records also needed, you should create a reverse zone file for the same host, in /var/named/mydomain.local.rev.db.
Once the zonefiles are ready, this is how to declare each of them in named.conf, otherwise BIND will not read them:
zone      “mydomain.local” {
    type master;
    file “/var/named/mydomain.local.db”;
    allow-transfer { SECONDARY-NS-IP; };
};
the last option is only needed if you are also going to set up a SECONDARY server for the same zone, at the IP address SECONDARY-NS-IP. Its declaration inside named.conf would have almost the same format of the master, with just the “slave” type, and an extra line pointing to the IP address of the PRIMARY server:
zone      “mydomain.local” {
    type slave;
    masters PRIMARY-NS-IP;
    file “/var/named/mydomain.local.db”;
};
Connect to your home devices with dynamic DNS
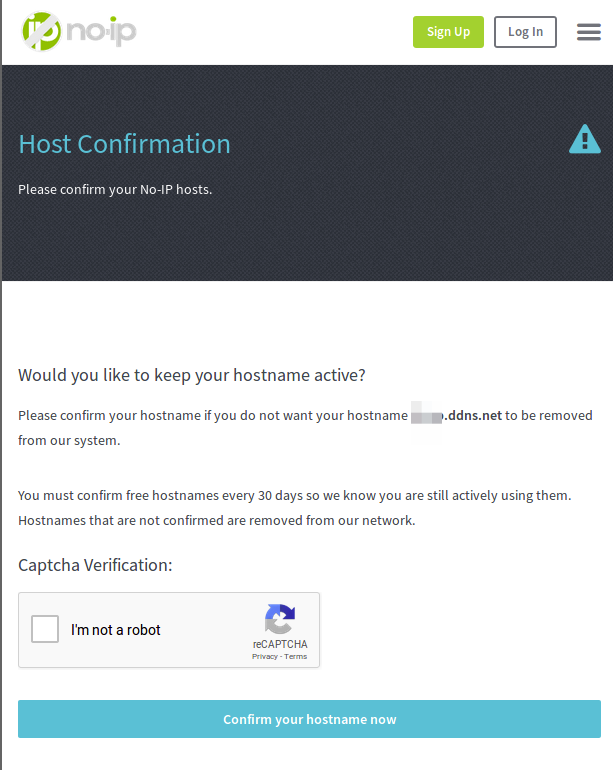
Unless you pay more for static IP addresses, your ISP assigns and reassigns dynamic ones, whenever it pleases, to every host in your home or office. Hack 4 consists of associating permanent host names of your own choice to the same devices, that REMAIN constant even the underlying IP addresses change. You can achieve this result via Dynamic DNS services, in at least two very different ways. The first is quite limited and free of charge only for very few hosts, but is really, really simple: get a free account with a service like no-ip.com, that runs domains like ddns.net for this very purpose.
After you have registered, follow to the letter their instructions to create your very own subdomain (e.g. YourNameAndSurname.ddns.net), install their client on your Linux boxes and you are done.
The other way to hack 4 cannot be “free as in free beer”, but is not too complicated, and has none of the limits of the other one. In a nutshell, you must:
- buy your own unique domain name (a few dollars per year)
- buy the cheapest Linux VPS (Virtual Private Server) with root access you can find (cost can be as low as 2⁄3 dollars per month)
- configure that VPS as Primary Name Server for the domain bought in step #1
- install on your local computer(s) some shell script that, whenever your ISP reassigns IP addresses to your devices, connect to the Name Server set up in step #3 and rewrite its zone files
A real-world implementation of this whole procedure for one Linux computer is described in full detail here.